I take too many pictures (a flaw that I have had for several decades). I am currently trying to aggregate my photo library into one single digital repository. This required sorting through tens of thousands of negatives and thousands of slides, and identifying the ones I want to digitize. Then, after the first pass of this operation was complete, the next step is to find a commercial scanning service1.
After doing some research, and setting some criteria, I came up with several possible services. I built a feature/price matrix based on information they published on their web sites (current as of July ’13). I then decided to send some samples to each service.
To best represent the kind of stuff I’d be having scanned, I decided I would send:
- a sheet of roughly 25 B&W negatives (all from the same trip, thus the same film stock, generally same exposure range, generally similar condition)
- a sheet of roughly 25 color negatives (all from the same trip, some of which had been cut into nonstandard strip lengths)
- a collection of 20 slides, including Kodachrome, Ectachrome, and unknown slide stock
The process of doing this narrowed down the seven to five. I ruled out scancafe.com because they do their scanning overseas, and I’m a raving xenophobe. Well, that, and the turn around time seems to be significantly longer for them. I also removed fotobridge.com from the running because they didn’t have any way of doing small batches; using a service for “up to 250 slides,” say, when I only needed 20 didn’t make sense.
I got my first batch back from ScanMyPhotos a staggeringly fast 3 days after I’d shipped out the negatives. The majority of the others came in after about two weeks, with the last set from ScanDigital straggling in last after a little more than one month.
ScanMyPhotos.com
ScanMyPhotos sent back two DVDs. DVD “Untitled”. Three directories, labeled “00000001,” “00000002,” and “00000003.” Images named for directory with an index, e.g., “000000010001.jpg”. The Exif reflects scanning by “EZ Controller.”
Note that the pricing average for ScanMyPhotos in the conclusion spreadsheet is skewed if you’re not scanning slides. If you’re just scanning negatives, ScanMyPhotos is significantly less expensive than the others.
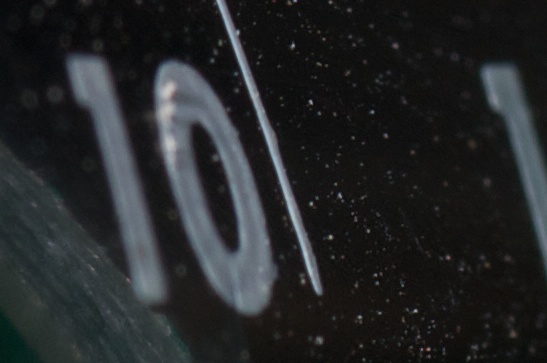
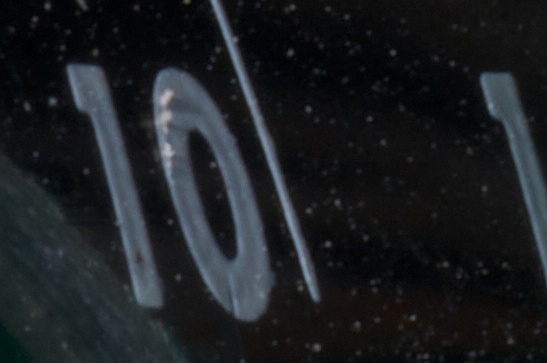
B&W scans are nicely contrasty, and nearly free of dust and specs. They have a visible “dither” noise, which looks like the results of an over-aggressive sharpening algorithm; running Aperture’s noise-reduction with gentle settings is a big improvement. The color negatives had good saturation and detail. The slides also look good to me, except for a strange grid that is visible in the darker images which is not apparent in the slide itself.
 B&W |
 Color Neg |
 Slide |
 Dark Slide w/ Grid Effect |
DigitalMemoriesOnline.net
Digital Memories provided a CD in a nice DVD short pack, labeled (externally) according to the project name I provided them, while the volume name was “New”. It contained three directories, named based on what had been written on the top of each negative sheet. Within each directory, the files were named for the directory with an index, e.g., CuscoTamboPiscalIMG001.jpg. Exif reveals they were scanned with a Nikon Super Coolscan 5000ED.
B&W images were bright and contrast was good, but there’s a fair amount of dust and scratches visible. Color negatives are also good, although it seems that both red and green saturation are slightly higher than they should be. Slides were quite good.
DigMyPics.com
DigMyPics sent back a CD labeled “493722_CDJPEG1” in a nice DVD short pack. It contained three directories, named based on what had been written on the top of each negative sheet. Within each directory, the files were named for the directory with an index, e.g., Machu_Picchu_35mm_001.JPG. Exif identifies the scanner as a Nikon Super Coolscan 9000ED.
Pricing for DigMyPics may be a bit misleading, as you can select online to reject up to 20% of the pictures after they’re scanned, and you don’t pay for them. You can view them on the web to choose which (if any) to reject. Only now when I write this, I realize that I don’t recall whether the selections are full resolution. I can only imagine that they’re not, otherwise you could download them without paying. In any case, don’t expect to select your rejects based on pixel-peeping.
B&W were nice and mostly contrasty, although the dust and scratches were still plentiful. Color negatives were good, also showing some of that slightly heavy red/green saturation. Slides were pretty good.
Southtree.com
Southtree sent back the negative sheets folded at the bottom of a box stuffed with paper. The DVD was labeled “Goldstein,” but the picture file names all inexplicably started with “Godstein.” Unlike the other services, the three kinds of images were all saved into the root directory of the DVD, with an index, e.g., “Godstein_3_037.jpg”. Exif did not contain any scanner information.
B&W were good and contrasty, but had a lot of dust and scratches. Color negatives had good color, but showed a surprising amount dust and scratches. Slides has good color, but they are all out of focus, even for negatives that are quite sharp.
ScanDigital.com
ScanDigital provided a DVD in a standard jewel-box, labeled (externally) with my name and order number. The CD volume name was “My Photos” and it contained two directories, “35mm Negatives” and “Slides”. Within “35mm Negatives” there were two further directories, “1” for B&W negatives and “Thailand” for the color negatives. Filenames reflected order number, folder, and index, e.g., 110798-35mmNEG-Thai-001.jpg for a color negative, and 110798-SL-001.jpg for a slide. Exif calls out the scanner as a Nikon LS-5000.
B&W have poor contrast, although the dust and scratches is better than most. Color negatives have muted colors, and not only show scratches but also have disturbing compression artifacts in gradient areas. Slides, however, are excellent both in color and sharpness.
Caveats
A comparison like this is fraught with opportunities to be unfair. I’ve tried as much as possible to separate the objective and subjective judgments so that you can draw your own conclusions. There’s also a whole lot of details, some technical, some not, that go largely unstated above. So in the interest of trying to represent everything as accurately as possible, here are some disclaimers:
I went for the low-end “consumer grade” processing with all of these services. It is quite possible that the more expensive offerings, targeted more at pros, would have better results.
Dust and scratches are always a challenge, and may not occur the same on all exposures (even on the same roll of film). Digital ICE, the dust and noise reducing technology used by Nikon scanners, does not work with B&W film and some kinds of slide film.
I sent in my images with no special notes, requests, or instructions. Some services have a space on their forms, which may (or may not) allow you to be specific about special handling (e.g., do not sharpen, or please make high contrast, etc.)
Conclusions
Attached here is a downloadable spreadsheet with both the objective and subjective rankings of these services.
1 True, I could scan them all myself. However, at 2-3 minutes per scan, it’d take me hundreds of hours that I could otherwise spend cluttering my collection by taking more pictures.